
 117
117
Artisan offers an e-fax service, allowing you to send medical records via secure electronic fax.
Setup
Address Book
You will need to set up your fax numbers in the Address Book for Referring Physicians, Primary Care Physicians, Pharmacies and Laboratories that you would like to send electronic faxes to. For more information on how to set this up the Address Book, please click here.
Enabling and Disabling E-Fax for Staff
E-fax is automatically enabled for all users upon account creation. If there are users who should not have access to e-faxing records, they will need to have that function disabled in their account.
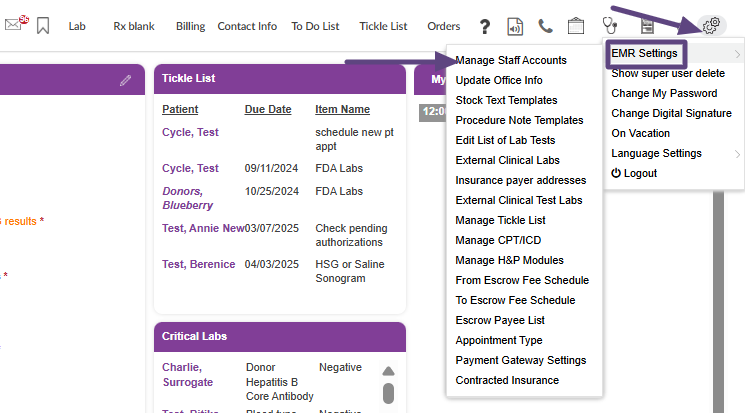
Click the Gears icon in the top right corner, hover over EMR Settings and select Manage Staff Accounts.

Click on the e-fax icon to the right of the account to disable it. Once disabled, the icon will appear gray. You can re-enable the e-fax function for users at any time.
How to Use E-Fax
An e-fax can be sent from anywhere that the e-fax icon is present.
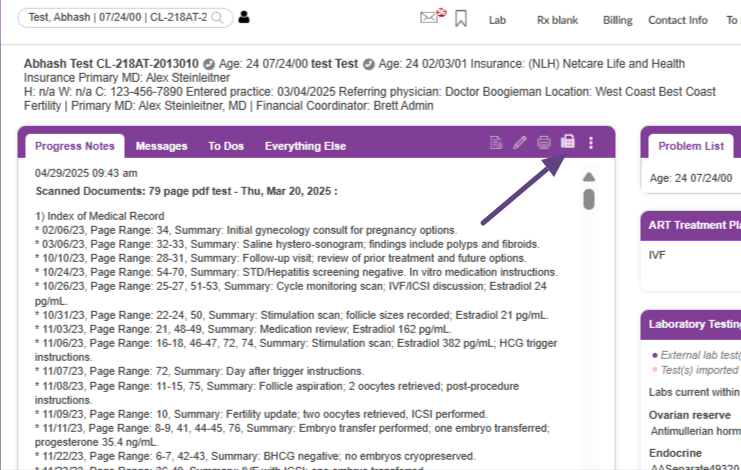
In the above example, we are sending an e-fax of the progress notes. Click on the e-fax icon.
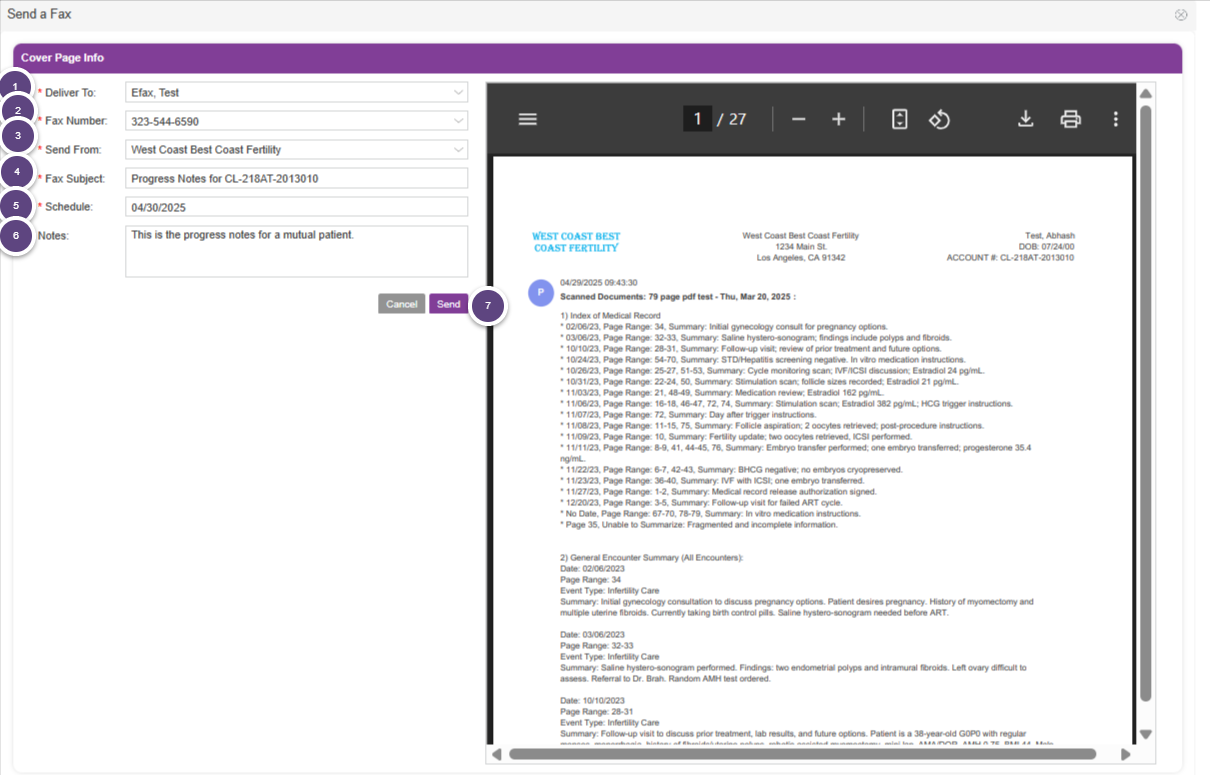
The records to be sent will pull into the preview window on the Send a Fax screen. Follow the below steps in order to send the e-fax.
- Select the physician that you would like to send the e-fax to. (This is pulling from the Address Book). If the patient has a referring physician selected in their Contact Info, that will pull into this field automatically.
- The fax number will automatically pull in from what is entered in the Address Book. You can also manually enter the fax number if it has not been entered in the Address Book.
- Select the location that the e-fax is being sent from.
- Enter a Fax Subject. (This is a free text field. In the above example, we have included what is being faxed and the chart ID for the patient)
- Schedule- this will automatically pull in the current date. This date cannot be changed.
- Notes- This is a free text field where any additional notes that need to be made can be entered. This will be sent on the cover sheet of the e-fax. It is not a required field.
- Click Send to send the e-fax.

You will receive 2 green notification banners. The first one will let you know that the fax sending is in progress and you can continue to use Artisan normally. The second banner will alert you once the document has successfully been sent to e-fax.
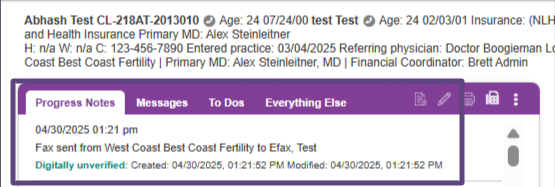
A progress note will automatically be generated with the date and time stamp of when the fax was sent, with information including the location the e-fax was sent from and who it was sent to.
E-Fax Log
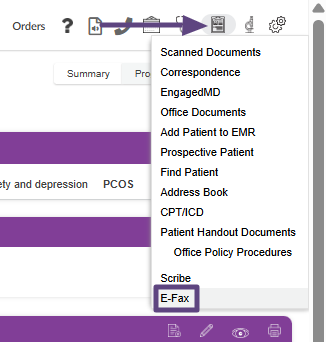
To view the status of the e-fax, go to Admin Tools>E-Fax.
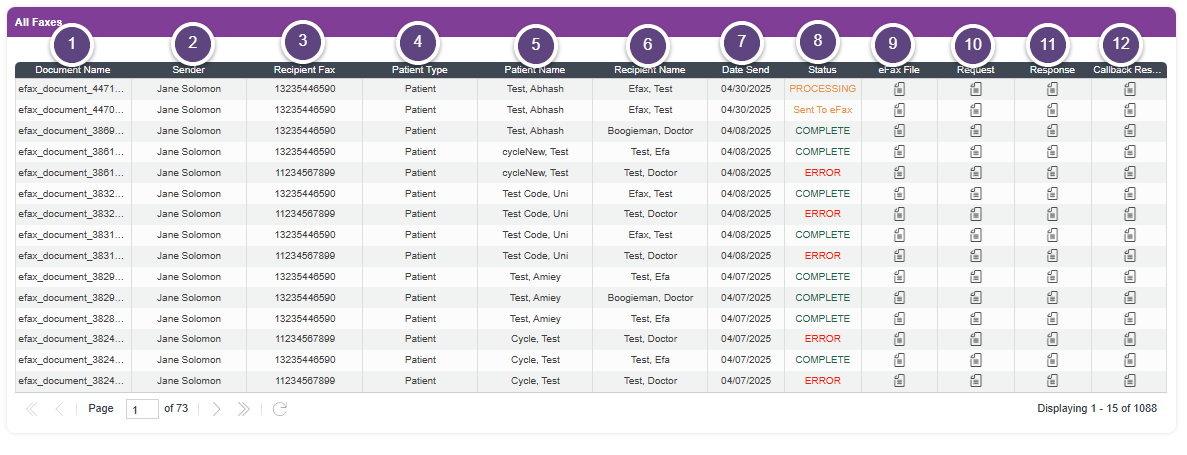
- Document Name- this is auto-generated
- Sender- this will indicate which staff member sent the fax
- Recipient Fax number
- Patient type- patient, donor or surrogate. Please note, any records that are sent for the partner are indicated under the Patient Type.
- Patient Name
- Recipient Name
- Date Sent
- Status- this will indicate the status of the e-fax. Processing indicates it is in the process of sending to e-fax. Sent to eFax means it has been sent. Complete means the e-fax has been completed and reached its destination. Error means there was an error during the sending process and the e-fax was not completed.
- E-Fax File- a copy of the records that were sent can be accessed here.
- Request- this show you the name and number the e-fax was sent to, the location it was sent from, subject line and a HIPAA statement. The notes will display in front of the HIPAA statement in the message field.
- Response- this will indicate the fax ID and the destination fax number
- Callback Response- this will indicate the response received back from the e-fax destination
All e-faxes sent will be housed in this log in the order that they were sent, starting with most recent to the oldest e-fax.
Areas Where E-Fax is Available
Below is a comprehensive list of all of the areas where e-fax is available.
Clinical Info
- My Appointments (only available for practitioners)
- Progress Notes
- Messages
- To Dos
- Everything Else (please note that when e-faxing documents from this tab, you will have the option to which documents you would like to include. See further below for more information on this)
- Laboratory Tests
- Andrology Reports
- H&P
- Contact Info
ART Schedule
- Surgical Grid
- ER/ET
- Lab Schedule
- FET
- Third Party Parenting
- IUI Schedule
Donor and Surrogate Accounts
- Contact Information
- W-9 Forms (for donors)
- Progress Notes
- To Dos
- Laboratory Testing
- H&P
- Messages
- Everything Else
ART Cycles
- ART Setup Tool>Trial Calendar for Review
- RX
- Lab Referral
- Lab Notification>Lab Referral
- Cycle Sheet Progress Notes
- Trigger/Preop Instructions
- Luteal Phase Calendar
- Complete Calendar
- Preop Orders
- Preop H&P
- Op Note
- ET Note
- Lab Notes- Lab Summary
- Lab Notes- Progress Notes
- Pregnancy Notes
- Pregnancy Calendar
- Pregnancy- Referral Letter
Accounting
- Itemized Receipts
- Account AR
- Payment History
- Print Statement
- Print Receipt
- Escrow- View Escrow Payments
- Escrow- Print Escrow Statement
- Escrow- Escrow Details
- ART Treatment Estimates
Other Areas
- RX Blank
- Correspondence
- Procedure Notes
How to Select Scanned Documents from Everything Else
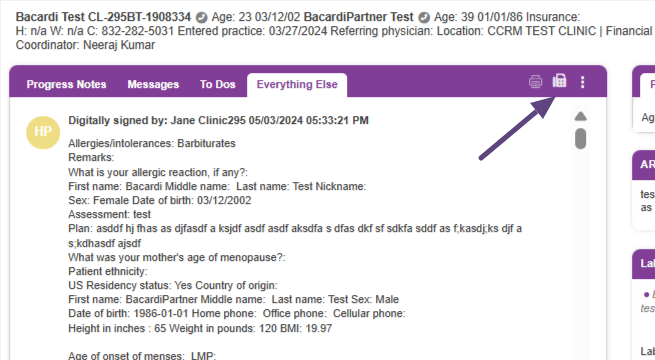
From Everything Else, select the e-fax icon.

- Select if you are sending patient only, partner only or records for both.
- Select what records you are sending.
- Select Fax.
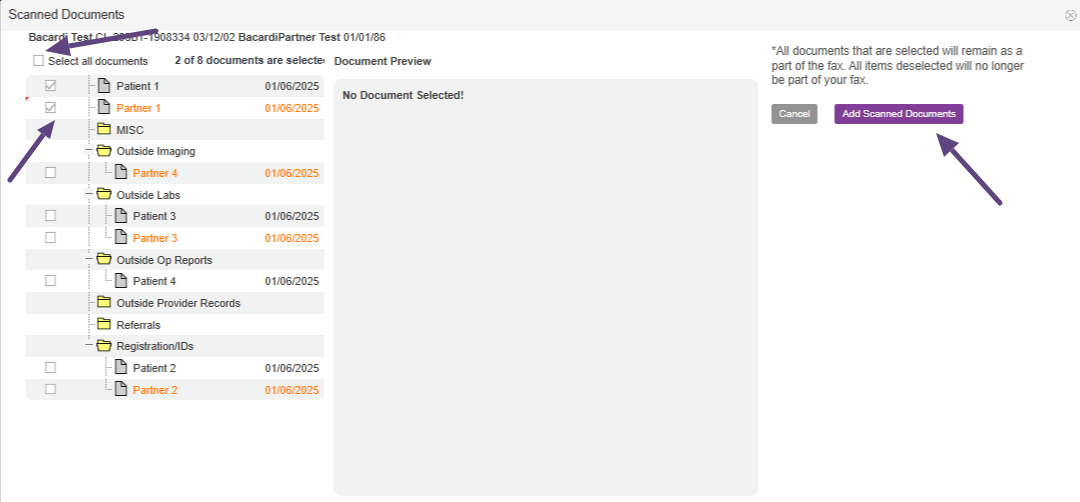
Click Select All if you wish to send all scanned documents. Otherwise, you can select which documents to send by clicking on the checkbox to the left of the document. Click Add Scanned Documents to move to the next step, or Cancel if you do not wish to send any documents.
From here, you will be taken to the e-fax screen where you will follow the steps to send the e-fax off.
Please note, consents are included in the scanned documents that are sent from Everything Else.
**All manuals are compliant with HIPAA regulations. No patient information has been released. All screenshots above were taken from a test clinic with fake patient information.

